Wednesday, September 17, 2014

My Cloth Diaper Hospital Bag--In Depth List!


I am 40 weeks pregnant with our third baby and we are anxiously awaiting her arrival! We have had great hospital experiences and pretty much know what to look forward to and know what we will need. I LOVE packing in general and am pretty organized. This may seem like a lot of stuff, but I like to be prepared and we only have two bags and a train case for everything. Also, in the past, we have spent up to three days in the hospital (from labor to our pediatrician signing us out), so it will be nice to have enough stuff and feel as much at home as possible! I will be providing any link I can to the products that I am listing.


Let's get started!

I will be having an all natural birth and we will be exclusively cloth-diapering. There are certain products pertaining to both so I will explain what each item is for. Hopefully this will help you pack your hospital bags!

Here are items for Mommy & Daddy:

We will be using my Large Utility Tote and a Top-A-Tote from Thirty-One for our things.

*A cotton dress for getting to the hospital and for laboring in (So much more comfortable to walk around the halls in this rather than a hospital gown!)
*Bike Shorts (to wear with the dress)
*Flip-flops
*One pairs of yoga pants
*Two pairs of yoga shorts
*Two tank tops
*Two loose, flowy tops
*An assortment of panties
*Two pairs of socks
*Two nursing bras
*Two boxers for Daddy
*Two extra shirts for Daddy
*An extra pair of shorts for Daddy
*One laundry bag
*Camera & video camera
*Phone & camera chargers
*Notebook & pen (a must for notes and documenting the labor progression)
*My birth plan & signs for the labor room
*Goodie bags for my nurses
*Word search book
*Bluetooth speaker for music
Snacks (in a Picnic Thermal Tote from Thirty-One):
*A couple gallon sized Ziploc bags and mason jars full of ice as our "ice packs" so we can refill them at the hospital
*Three Lemon Luna bars
*Mixed nuts
*Dried cherries
*One bag of The Good Bean Chickpea Snacks
*One bag of Mrs. May's Cashew Crunch
*Britney Spears Baby Pink Couture Pop with a strawberry refill. (Something so simple makes me so happy! It's a nice treat in the hospital...thanks Momma ♥)
*Assortment of fresh juices from Trader Joe's
*Also, we will be bringing a couple of  1.5L bottled waters from TJ's


I got the train case at the thrift store and gave it a makeover
with spray paint, jewels, and lace. Easy DIY--I get compliments on it all the time!
Train case items:
*Chapstick
*Face wash (travel size!)
*Face wipes
*Face moisturizer
*Grapefruit toner (made with Grapefruit essential oil and water)
*Toothbrush/toothpaste
*Deodorant
*Nail clippers
*Body lotion
*Body scrub
*Shampoo/conditioner sample packs (easy and compact for traveling!)
* A headband
*Two hair ties & a handful of bobby pins
*Evian Mineral Water Spray (This SAVED my life when I was in the transition phase of labor with my last baby. I was boiling hot in between contractions and my husband would spray me down as I was laying there totally limp with exhaustion.)
*An assortment of Essential Oils and my diffuser for laboring, post baby, and as my perfume
*A small makeup bag with simple items, nothing fancy! (All super easy to apply and worth having when I have tons of visitors! I may not wear all of it at once, or any of it at all, but I want to have it just in case, and I like having a fresh face! :)
        -Bare Minerals Foundation compact in Fairly Medium
        -Bare Minerals Powder Concealer in Bisque
        -Travel size Bare Minerals Mascara
        -Lorac Pro To-Go pallete (eye shadows, blush, and bronzer in one!)
        -MAC Paint Pot in Painterly     
        -Travel size Buxom Mini Full On Lip Cream in White Russian
        -Sigma Brushes
*Daddy's deodorant, toothbrush and other essentials


Here are items for baby:

We are using the Medium Utility Tote (no longer available) from Thirty One for her things.

*Four newborn onesies
*Two pairs of newborn Babylegs (A must for cloth diapering! So cute!)
*One infant Swaddleme swaddler
*One Aden and Anais bamboo swaddle blanket
*One mama-made burp cloth (owl print)
*One nursing cover (doubt I will use it, but just in case!)
*A combination of 24 newborn cloth diapers and accessories:
       -9 newborn prefolds
       -4 flat diapers
       -4 mama-made fitted diapers      
       -1 Snappi
       -5 Lil Joey's all-in-one diapers
       -1 Blueberry newborn fitted
       -1 Smart Bottoms newborn all-in-one diaper
       -3 Thirsties Duo Wraps size one
*One medium Planetwise wetbag for her soiled diapers
*One spray bottle of water
*One small Plantetwise wetbag to carry:
*6 Organic Reusable Nursing Pads
*24 flannel cloth wipes


I will also be bringing my stability ball to labor with! Loved this!!


I know that was super in-depth, but it helped me feel in order typing it all out! I hope this helps you too!


Sunday, April 27, 2014

All About Cloth Wipes!


Ever since we started using cloth diapers, I thought it would be best to start using cloth wipes as well. We just toss them into our diaper pail and wash them along with the diapers; this makes diapering that much easier! No need for a second pail for disposable wipes or having to use twice as many disposable wipes for one change.


Cloth wipes are so sturdy and clean up messes SO much better than a disposable wipe, so you don't need as many. I highly recommend using cloth wipes if you already use cloth diapers!


There are a lot of options for using cloth wipes!
Let's talk about a few:

Baby wash cloths:

Baby wash cloths from Target or Walmart make super inexpensive cloth wipes and get the job done!

Receiving blankets or other fabric:

If you have old receiving blankets or some other fabric like flannel or terry, cut it up into pieces and these will make nice cloth wipes also.

Brand Name Wipes:

Cloth diaper brands such as Grovia, Thirsties, Charlie Banana, Bumgenius, and Planetwise sell their own cloth wipes along with their popular diapers and accessories. You can find flannel, organic cotton, and baby terry fabric among these brands. Below are some direct links to these brand name wipes. You can find most of these wipes on Amazon.com which is awesome, but I love supporting companies like Abbyslane, Sweetbottoms, and Jack Be Natural.

Charlie Banana Wipes (LOVE their Organic Cotton Wipes!)
Grovia Wipes (These are SO soft! We haven't used them yet but I was able to find them really cheap on my favorite new/used site Spot's Corner)
Bumgenius Wipes
Thirsties Wipes
Planetwise Wipes (These are great flannel wipes!)

Etsy Wipes/Washcloths:

Probably my favorite site to shop for cloth wipes is Etsy! There are SO many beautiful options to choose from and I love supporting other moms. Some shops sell "baby washcloths" that can easily be used as super sturdy cloth wipes. There is a wide range of materials and thickness when choosing wipes on Etsy. Some sell single-ply flannel or cotton wipes, and others sell thick chenille or two-ply flannel wipes. Here are my favorite shops to buy cloth wipes:

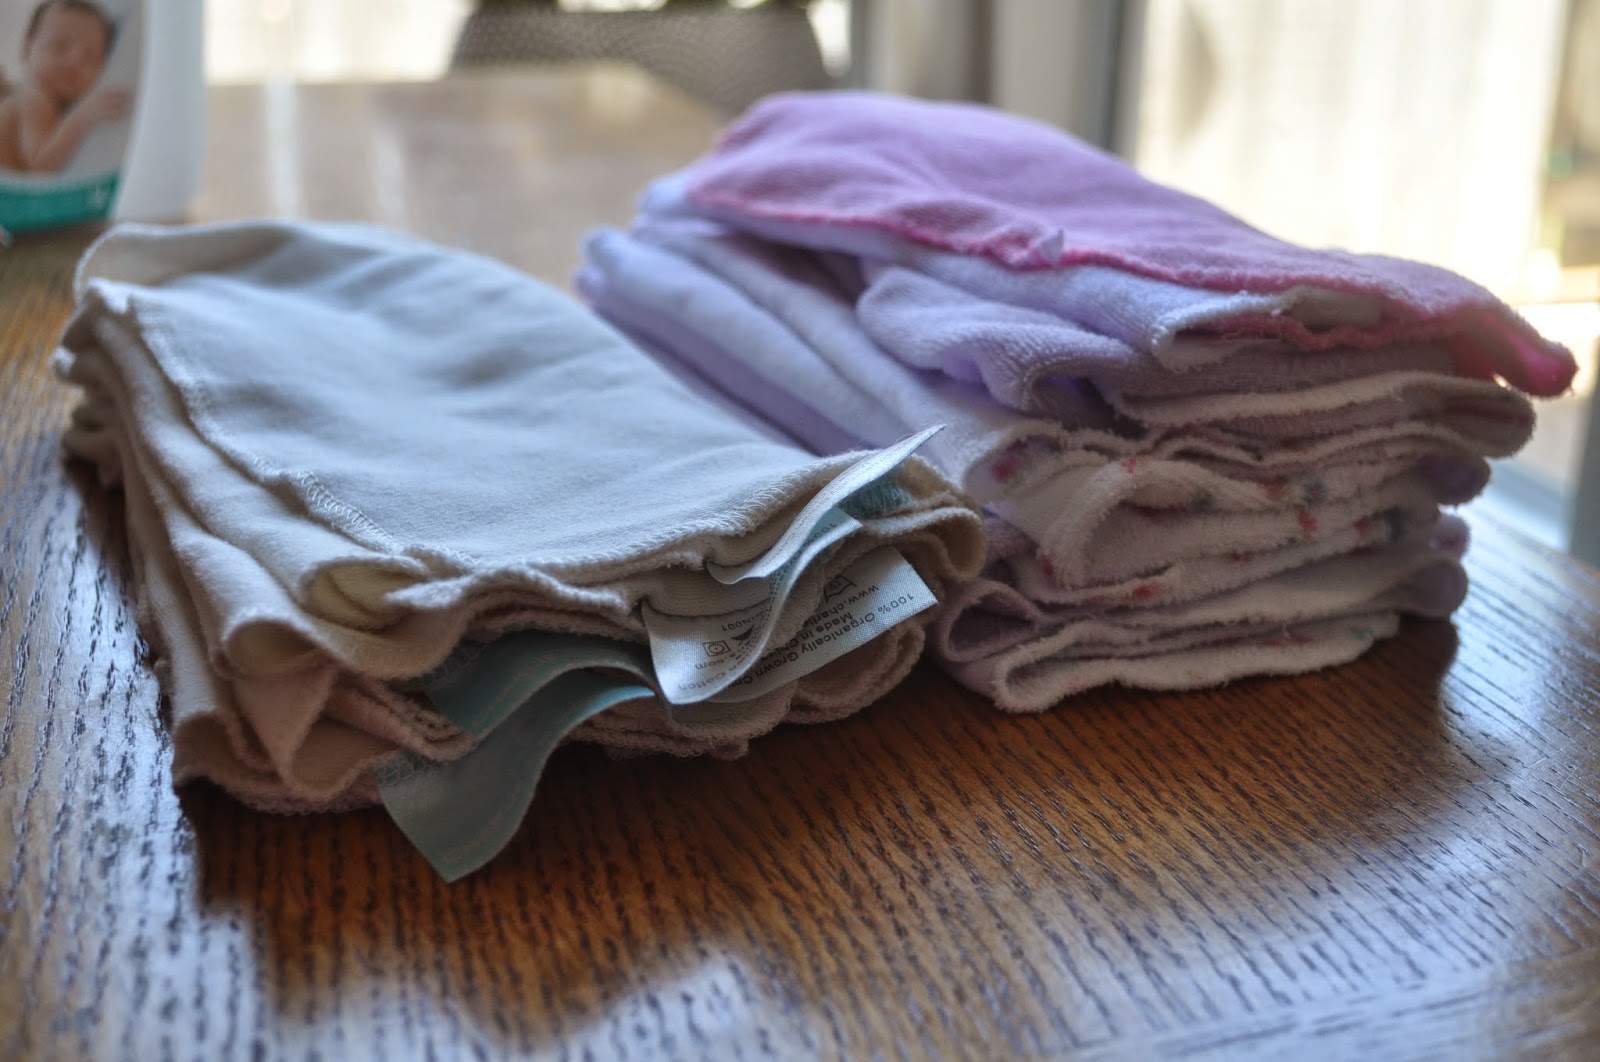
KBExquisites (first picture below)
dezignzbyliz (middle picture below)
TurtlesRUs

These are all wipes that I have purchased on Etsy. The first two sets of wipes are made with a minky backing. That is a popular fabric that Etsy sellers use for wipes.
(I have also bought some chenille washcloths that I love from a seller who no longer sells them [bottom picture], but SO many other shops sell the same thing!)


Here is a direct link to a "cloth wipes" search
to help you start browsing!
CLOTH WIPES ON ETSY


Now that you have a little bit more information about cloth wipes, find what works for you and your little one!

Depending on the size and thickness of the cloth wipe that you like best, you can still use a disposable wipe container for storage. I
have found that the Charlie Banana wipes and baby washcloths fit
perfectly in a container and you can fold them so they dispense the same way too. Here is a tutorial on how to fold them:


1. Lay your first wipe on a flat surface
 2. Lay a second wipe on top of your first, overlapping.


 3. Fold over the first wipe onto the second wipe.


 4. Repeat the process on either side until you have made a stack big enough to fit in your container. Lay your wipes in your container and pull the top wipe through the dispenser hole.


Organic Charlie Banana wipes and
baby washcloths from Target


 Check out my post on how to makeover your wipe container so you can use your cloth wipes in style
 
CLOTH WIPE SOLUTION SPRAY:
 
This is not totally necessary when using cloth wipes. We just use water in a spray bottle and wet the wipe before wiping the bum. Some people like a wipe solution to submerge or spray their wipes before using. Something as simple as Dr. Bronners Mild Baby Soap diluted in water is a great wipe solution. Also, there are a lot of brands that sell their own solutions ready to go, or concentrated. Etsy is a great place to find wipe solution cubes that you melt into water and you are ready to go!
 
We found that simple water spray with a cloth wipe followed by a smear of and a cloth diaper safe bum cream like coconut oil, Grovia Magic Stick, Grandma El's diaper cream, or CJ's Butter work great!
 

Saturday, April 26, 2014

Potty Training & Other Exciting News!!

Theresa is officially potty trained! Both girls only wear diapers at naptime and night time. Rachel will be four in September and I am thinking that she will be completely out of diapers by then. I am leaving it up to her to make that decision since she went to panties so soon (the month she turned two). Theresa will turn two in June, so I see her in a nighttime diaper for a while as well.

Diaper loads and diapering in general is not super exciting over here anymore, but not to worry because we are EXPECTING BABY #3!!! And IT'S A GIRL!!

I am in full nesting, cleaning, and diapering mode right now prepping for this sweet baby! I still have a ton of things cloth diaper and baby related that I want to post and talk about. Keep an eye out for new things! 

Saturday, July 27, 2013

DIY No Sew Bags!

These are so fun and easy to make! They are great for pretty much anything!
 School, groceries, day trips, beach days, diaper bag, etc.
I love to make them as gifts also.

Here is what you need:

*2- 18x21 inch pieces of the fabric.
OR one 21x36. Sometimes you can find squares of 18x21 inch
 fabric bundles at places like JoAnn Fabric. Cotton like material
works with the duct tape so no silky, lacy, bulky, or felt like material.
*2- 24 inch pieces of belting rope
*duct tape in coordinating colors
*scissors
*measuring tape
*iron
*stapler
 
Start by ironing both pieces of fabric to get any kinks out. Iron both sides.
 
Next, lay tape across one of the 21" sides of fabric.
Over lap each piece a little bit and continue down the fabric until you reach the end. Do this to both pieces. (Or the entire piece if you are working with a 36" piece of fabric like me)

 Once both pieces are finished, take the 21" side and fold it down about 2". Measure 7" in from the side and staple down one side of the belt. Don't go all the way to the top of the fold, only staple about half way up.

 
Lay a piece of duct tape across both pieces of belt to cover up the staples.
Use two pieces of tape for an extra hold especially
 if you plan to carry a lot in your bag.
 
Put both pieces on top of each other, having the front sides face each other, and staple the pieces together all around the edges. In my case, I just stapled two sides since the bottom is one piece. Try keeping your staples in a fairly straight line so your seams will be nice and even. Also, if you feel the need to trim up the sides or any part of the bag before stapling, now is the time.
This is a great way to ensure that everything lines up.
 Once you have stapled up the sides, seal them with duct tape.
I uses two layers for mine.
To make the bottom of your bag square, put your hand in the bag and poke out one corner so the triangle is nice and flat on the table. Use your measuring tape to act like the bottom of the triangle and measure across 7". Staple across the bag and seal the staples with duct tape on both sides. Do this to both sides of the bag.


 Turn your bag inside out and use your hands and fingers to press open
the bag to its potential. Use the duct tape and secure the
triangle flaps to the bottom of your bag.

(I wanted the bottom of my bag to be extra sturdy, so I cut a piece of cardboard to fit the bottom and covered it with tape. You can also tape the cardboard to the bag or leave it free. This way, you can take it out for days that you want your bag to be more floppy.)
 
Done!


Thursday, July 25, 2013

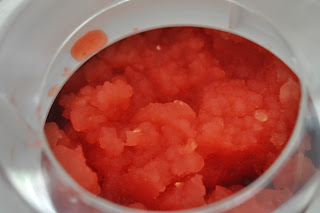
Tropical Watermelon Sorbet

 This Tropical Watermelon Sorbet is one of my favorite things to make in the Summertime! This sweet and tangy dessert is perfect during a hot day or after a dinner party. It will take your taste buds to a tropical paradise!


What you'll need:
-An ice cream maker. Our ice cream machine is the Cuisinart Ice Cream and Sorbet Maker.


-1 (2-pound) piece of seedless watermelon, rind removed ad flesh cut into 1-inch pieces to yield about 3 1/2 cups 1 (6 ounce) can of pineapple juice, chilled
 
-3/4 cup canned ginger ale, chilled
 
-1/3 cup fresh lime juice, about 3 large limes
 
-1/3 cup grenadine (I recommend Rose's) 
 
I recommend that all of the ingredients are chilled before you use them.


In a blender, blend the watermelon, pineapple juice, ginger ale, lime juice, and grenadine until smooth. Pour into your ice cream maker and turn on your machine for about 35 minutes. If you have never used an ice cream maker before, be sure to follow the instructions on how to prep your machine before use (freezing the inner core).


10 minutes
 

20 minutes
                                 
30 minutes
 
Enjoy!!


Friday, July 5, 2013

Cloth Diaper Detergent/Booster

A cloth diaper safe detergent is a must when using cloth diapers. It is important that your diapers are clean, stink-free, and stain free. While I can't guarantee that all of your diapers will be stain free (check out my post on diaper stains), I can promise an easy wash routine! It's also important to avoid softeners, fragrances, enzymes, and any additive when washing cloth. Any of the things I listed will  mess with the performance of your diaper.
 
Since we started to use cloth diapers, we have gone through a few different cloth diaper safe detergents. We realized what works for our diapers, and we worked through any bumps along the way.  A year later, I can safety say that I have found the perfect wash routine that works for us. Every baby is different. You might have issues that need resolving (stink, repelling, leaks), and this detergent is easy, simple, and does the trick. If you are having issues with your diapers, its important to go back to basics and simplify your wash routine. Get rid of any "extras" that you might think are helping...they might actually be the problem. For example, any product that is suppose to freshen, or help cloth diapers might not be rinsed out fully and be lingering in the diaper, causing stick issues. Even if the product is "cloth diaper safe"' if may be causing an issue. Don't stay away from CD safe products all together! Just remember to use very little in your wash routine and only use CD safe creams and bum products on your baby so as to not ruin or mess up your diapers. If you find that your diapers are not performing well, (stinky, repelling, leaking), it may be time to strip them. (Stay tuned for my post on stripping diapers) 

Here is my detergent "recipe":

Equal party Oxygen cleaner (I use Oxiclean Free), baking soda, and washing soda. Scoop them in a jar or container and mix! Use one to three scoop depending on your water or machine. I have a front loading HE machine and soft water. I use about two tablespoons.

I have found that this detergent does great on its own,
but I also like to use it as a booster with these detergents:

 Country Save
&/or
 
because the Oxiclean, baking soda, and washing soda are not necessarily "detergents," I like to have these two detergents on hand to spice up my laundry loads by switching it up every other load or two. Do what works best for you! Just don't feel intimidated! When in doubt, do an extra rinse ;-)


Cloth Diaper Wash Routine


An effective wash routine is a priority when using cloth diapers! After one year of using cloth, I have found a perfect wash routine that leaves our diapers fresh, clean, and stink-free.

Here is our routine step-by-step using a front loading HE machine:

1. Load all of the soiled diapers into your machine. Toss in your wet bag or pail liner too.

2. Do one COLD "rinse & spin" with and "extra rinse" and "no spin". This will allow the diapers to be double rinsed and extra wet and "heavy" so your washer fills up extra on the next load. NO detergent. (should be about 20 min long) If you do not have a "rinse & spin" option, do one "quick wash" with "no spin".

3. Scoop your CD safe detergent (<--check out what we use) into the compartment and do a normal HOT wash with EXTRA water. (Our machine has a button to increase the water load.)

4. (Optional) Sometimes, I like to do one more HOT "quick wash" to get the diaper extra gunk-free, but this is totally optional!

5. Do another COLD "rinse & spin" cycle (ours is 19 min) with or without a CD safe fabric softener. Vinegar is a popular CD fabric softener, but I found one that I really like. I use it every other diaper load, and it leaves prefolds, flats, and inserts soft! Ecover Fabric Softener. If you are not going to use fabric softener, I would still recommended this last rinse cycle.

5. Once the diaper are spun dry, take out all diapers that have PUL (polyurethane laminate), or water resistant material (plastic like). Load all of the inserts, fitted diapers, cotton, bamboo, and/or hemp into the dryer and do one delicate cycle and set your dryer to the longest dry time. This way, the diaper dry on low for a while. Super hot dryer heat=crunchy prefolds and flats.

6. While the inserts and fitted are drying, hang the diaper shells on a drying rack and stick them outside

7. Once the dryer beeps, hang the rest of the diaper load onto racks and let the sun do its magic!

The sun is a curtail part to our wash routine! The sun naturally bleaches, disinfects, and freshens diapers. The outside fresh air is so wonderful for diapers and makes a huge difference in performance and overall feel, look, smell.

Every few washes, I toss a cloth wipe in the load that has a few drops of Melaleuca oil (tea tree) and Lavender essential oil. These essential oils are great for disinfecting and a fresh smell.

Another thing I do to ensure no stick issues is sink rinse extra wet diapers, nap diapers, and overnight diapers. Giving those diaper a quick rinse in the sink before tossing them in the pail is a great way to get rid of extra pee and stink before your main wash.

This routine works for us. Don't worry or feel bad if something in this routine is not working for you or if you are having issues after washing/ drying this way. I can help you troubleshoot! Please let me know if you have questions!


Gettng Rid of Diaper Stains

Cloth diaper stains are a bust! Fortunately,
 there are a few remedies to help remove stains.
 
My number one stain remover remedy is the SUN!
The sun is such a wonderful addition to your cloth diaper
wash routine and provides essential power to diapers.
 
The sun naturally:
 
*dries
*disinfects
*freshens
*removes stink
*removes/fades stains
 
ALL FOR FREE! I like free...


I consider sunning our diapers absolutely essential. If you are unable to place your diapers outside or have wacky weather, even laying diapers by an opened or closed window does a great job. Any sort of natural light or fresh air will help cloth diapers. Sometimes I will put the drying rack buy an open window over night and let the fresh breeze do it's thing! 
 
In order to make the most of the stain removing
power of the sun, follow these steps:
 
After your diapers are finished in the washer (wash routine), use a clothes line or drying rack hang diapers with stains facing up. I like to lay any diaper that is stained on the top rack. Also, be sure that the stained area is slightly damp because that will help the sun "evaporate" the stain. If you are pulling diapers right out of the washer they should be damp enough, but use a spray bottle of water to concentrate a stain if you want. (I like to lightly spritz the whole rack right before they go outside, especially if they've been waiting over night to go outside.) Breastfed poo stains are like magic to get rid of! Once solid foods are introduced, stains are slightly harder to completely erase, but they do fade!
 
I do not have an exclusively breastfed baby anymore,
but I will add before and after pictures as so as I do!

When my fist set of drying racks needed to be replaced (since we use them EVERY day, they eventually fell apart), I have come up with alternative ways to get the diapers out in the sun. This was during our in between stage when I was getting new racks:


Other ways to help remove stains are certain laundry products and soaks.
These are helpful especially when you do not have a lot of sunlight to work with.
But remember that any of these remedies will
work even better when paired with the SUN!

*Treat the stained area with Babyganics Stain Remover before washing
 
*Soak stained diapers in a sink full of hot water and a scoop of Oxiclean Free. Rinse the diaper and ring out before adding to your other diapers in the wash.
 
*Spot clean the stain with baking soda, Bac-Out, or Oxiclean Free. Spray or sprinkle your spot cleaner onto the stain and let it sit or scrub with a toothbrush or small scrubber. Let is soak in hot water and rinse before adding to your wash. 


Thursday, June 27, 2013

Coffee Body Scrub

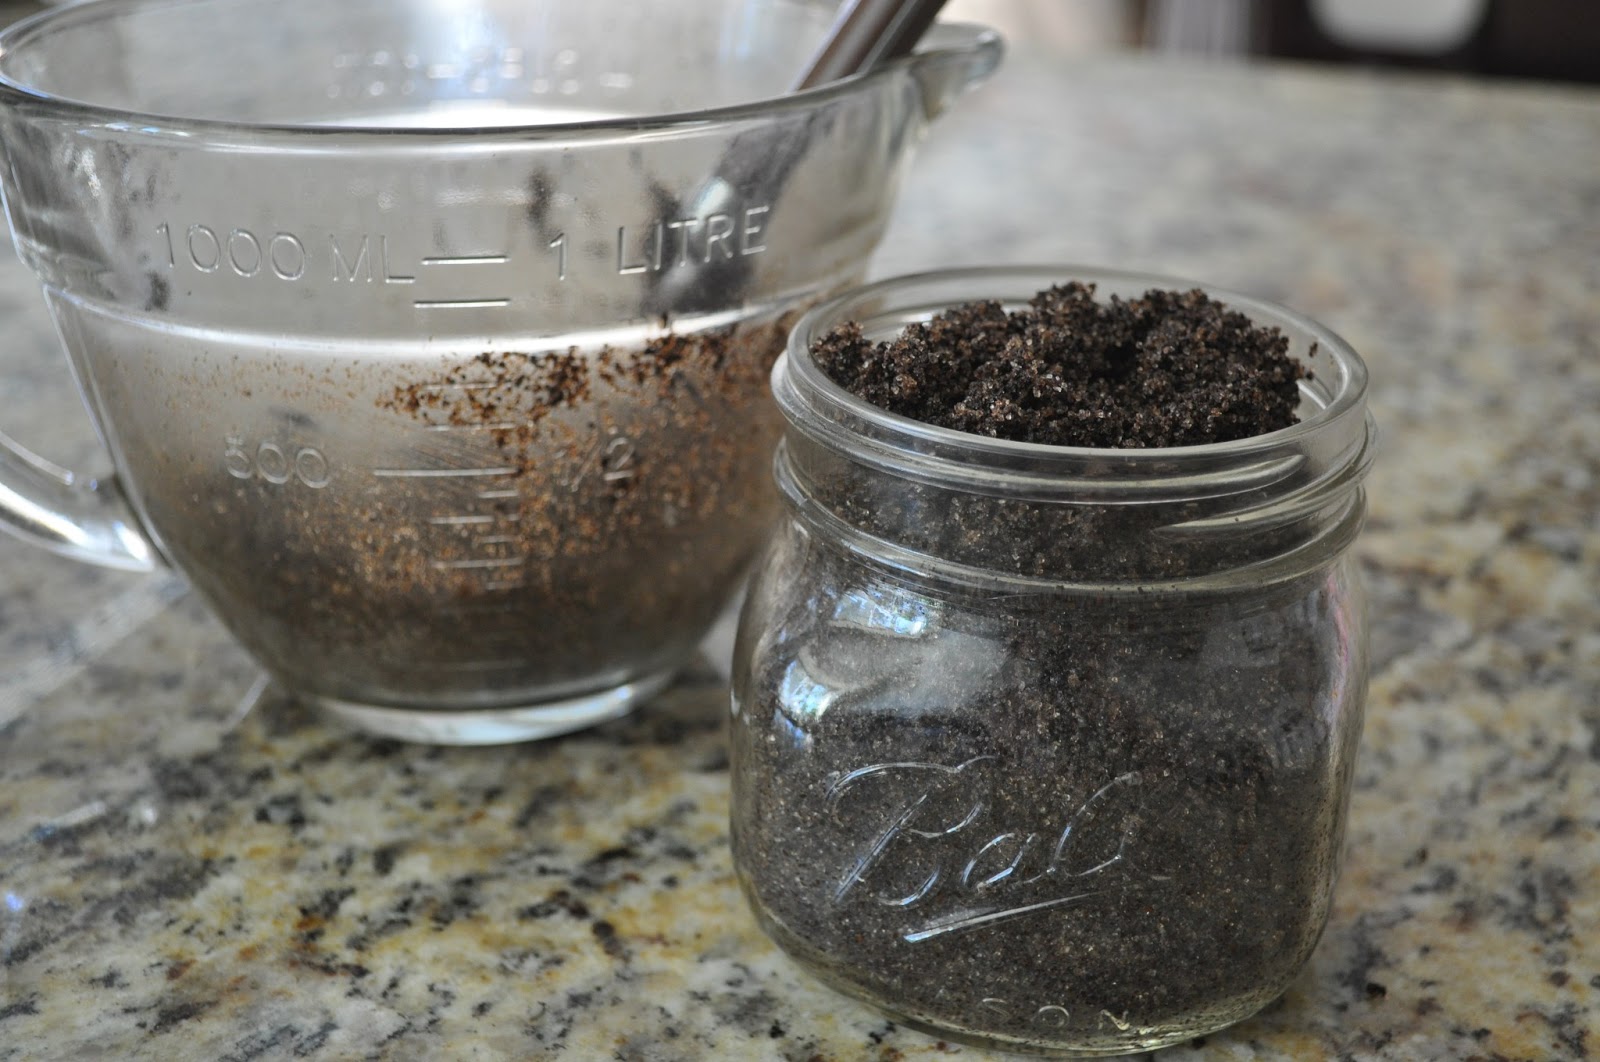
This is my favorite body scrub and it's so simple to make!
This scrub also makes the perfect gift :)
 
Gather your ingredients:
 
*ground coffee
*raw sugar
 
(Quick note- use any flavor coffee you want! That's what's great about this scrub. You can make it personal and different every time. This is whole bean coffee, but I just grind it right before I make the scrub.  Also, I use organic sugar because it has a raw, thicker texture than plan white sugar and I feel it makes for a better consistency scrub.)

 
Place equal parts sugar and coffee into a bowl and use a fork to evenly mix the two. Once your sugar and coffee are perfectly blended, add three or four table spoons of oil and start to mix. Add more oil as you go until you hit the consistency you like.  
 
Enjoy!! 

Tuesday, May 21, 2013

Caring for Orchids

Orchids are my absolute favorite!
There are so many beautiful varieties and colors.

Caring for orchids is simple and fun. I am not an orchid expert, BUT I have been caring for several orchid plants for a while and have figured out how to properly care for the delicate flower. Here is a short caring guide if you want to keep an orchid plant or two in your home.

It is easy to over water your orchid plant! As much as we feel like plants or flowers need water every day, an orchid only need to be watered every 7-12 days. I water my plant every ten days give or take.  As long as the leaves are a rich, dark green color, then your orchid is well nourished and should bloom nicely. It is important the your orchid receives good, indirect sunlight. I leave mine on our dining room table where it is able to get about 50% sunshine.

Here is a break down:

*nice dark leaves
*indirect sunlight
*water every 10 days

Your orchid flowers will eventually wilt and fall off,
leaving an empty little stub.
Keep caring for your orchid as usual and in about a month,
the flowers will bloom back.
 
I am not sure how long this particular plant will last.
I am pretty sure I will get through a few more blooms!

I purchased this orchid with three bloomed flowers. These are pictures of the second bloom. I have not added any soil to the plant that I purchased. I just took the smaller pot out of the bigger pot that it came in and set it into an owl pitcher. I bought my orchid at Trader Joe's


If you are looking for more in depth orchid information,
check out this site: ORCHID INFO

Tuesday, September 25, 2012

Easy Toddler Snacking

My sweet two-year-old loves her snacks! She is growing so fast and is so active; she is always hungry for something. I have a 1/8 measuring cup that is supposed to be for measuring coffee. I do not use it for coffee, nor do I use it for baking or cooking. I have found that this measuring cup is the perfect size for all of Rachel's snacks. I would give her a little bowl of something and find it half eaten or dumped somewhere around the house. This way, I feel more in control, it helps me keep track of how much she is eating, and it cuts down waste. I have no problem feeding her healthy snacks throughout the day because this little cup gives her the perfect amount for her little tummy.

 She loves the handle and it is really easy for her to hold. I think that it also helps with her hand control. She needs to hold the cup steady in order to get a snack, instead of a regular bowl sitting on the ground or other surface. She also eats slowly because she is concentrating harder on her ability to hold the cup and pinch each bite. I'm happy that she is not scarfing all of her snacks.
 
1/8 cup = 2 tablespoons = 1 ounce 

 Organic Green Grapes


Dried Cherries & Dried Apricots                    Organic String Cheese
                   
                                    
Organic Fruity O's                                         Pistachio Nutmeats


 Organic Popcorn                                           Semi-Sweet Chocolate Chips
                         (I only fill it half way for these)