Tuesday, May 21, 2013

Caring for Orchids

Orchids are my absolute favorite!
There are so many beautiful varieties and colors.

Caring for orchids is simple and fun. I am not an orchid expert, BUT I have been caring for several orchid plants for a while and have figured out how to properly care for the delicate flower. Here is a short caring guide if you want to keep an orchid plant or two in your home.

It is easy to over water your orchid plant! As much as we feel like plants or flowers need water every day, an orchid only need to be watered every 7-12 days. I water my plant every ten days give or take.  As long as the leaves are a rich, dark green color, then your orchid is well nourished and should bloom nicely. It is important the your orchid receives good, indirect sunlight. I leave mine on our dining room table where it is able to get about 50% sunshine.

Here is a break down:

*nice dark leaves
*indirect sunlight
*water every 10 days

Your orchid flowers will eventually wilt and fall off,
leaving an empty little stub.
Keep caring for your orchid as usual and in about a month,
the flowers will bloom back.
 
I am not sure how long this particular plant will last.
I am pretty sure I will get through a few more blooms!

I purchased this orchid with three bloomed flowers. These are pictures of the second bloom. I have not added any soil to the plant that I purchased. I just took the smaller pot out of the bigger pot that it came in and set it into an owl pitcher. I bought my orchid at Trader Joe's


If you are looking for more in depth orchid information,
check out this site: ORCHID INFO

Tuesday, September 25, 2012

Easy Toddler Snacking

My sweet two-year-old loves her snacks! She is growing so fast and is so active; she is always hungry for something. I have a 1/8 measuring cup that is supposed to be for measuring coffee. I do not use it for coffee, nor do I use it for baking or cooking. I have found that this measuring cup is the perfect size for all of Rachel's snacks. I would give her a little bowl of something and find it half eaten or dumped somewhere around the house. This way, I feel more in control, it helps me keep track of how much she is eating, and it cuts down waste. I have no problem feeding her healthy snacks throughout the day because this little cup gives her the perfect amount for her little tummy.

 She loves the handle and it is really easy for her to hold. I think that it also helps with her hand control. She needs to hold the cup steady in order to get a snack, instead of a regular bowl sitting on the ground or other surface. She also eats slowly because she is concentrating harder on her ability to hold the cup and pinch each bite. I'm happy that she is not scarfing all of her snacks.
 
1/8 cup = 2 tablespoons = 1 ounce 

 Organic Green Grapes


Dried Cherries & Dried Apricots                    Organic String Cheese
                   
                                    
Organic Fruity O's                                         Pistachio Nutmeats


 Organic Popcorn                                           Semi-Sweet Chocolate Chips
                         (I only fill it half way for these) 


Monday, September 24, 2012

52 Reasons I Love You

(Rachel got a crayon to it before I could stop her.)
 
This is a super fun gift that will make you and your recipient smile. 
It's inexpensive and such a thoughtful way to share your love.

Materials needed:
*deck of cards
*hole punch
*sand paper
*2 book rings
*glue stick
*decorative scissors
*jewels (optional)

Start by using a square of sandpaper to "roughen up" each card.
This will give them an instant vintage look.


Next, Use a hole punch to make two holes in one card.
Use this card as your guide to punch the remaining cards.

Use a work document to type your 52 reasons. I just insertsed a table
 that was 4x5. This made it neat and easy to cut. Cut each reason 
out with decorative scissors and glue one reason to each card.
(I did not put my cards in order. I thought it would
be fun for them to be random.)

I used the jokers as my front and back cards so that I would have all 52 cards for my reasons.
 Just cover both jokers with some colored paper to cover both sides of each card.
Decorate your cover card with jewels if you want to add some flare!
 
Clip on your book rings and you are finished!


Saturday, September 22, 2012

Garlic-Cilantro Hummus

Hummus is a favorite in our house. It is packed with fiber
& protein, and it is so easy to make from scratch.
 
Ingredients for Garlic-Cilantro Hummus:
 
*1 can of garbanzo beans
*1 tsp minced garlic
*1 tbsp tahini (what is tahini?)
*a nice handful of fresh cilantro
*1/2 of a lemon
*salt, to your liking

Place all of your ingredients in a food processor. I sprinkle a little bit
of salt in as I go and taste the hummus in between blends.
 
Scrap the sides down in between blending so all ingredients get incorporated.
....blending, blending, blending!
Pair your hummus with baby carrots, or fresh pita chips (slice
pita bread into triangles and bake for about 10 minutes, or place pita bread
halves in the toaster for a lighter crisp.) 
Replace the cilantro with sun dried tomatoes, green or black
olives, fresh bell pepper, or a blend of yummy herbs and spices
to make it your own! Hummus is so versatile.
 

Tuesday, August 28, 2012

Homemade Chocolate Syrup

This is one of my favorite things to make! One jar of chocolate syrup can be used for lots of yummy things in our house. We use it for iced or hot coffee, in almond milk, & on top of homemade banana soft serve and ice cream. This chocolate syrup recipe is so clean and very simple. No high fructose corn syrup, preservatives,  or artificial flavors. You can't say that about most store bought syrups!
 
Here is what you will need:
*1 c. water
*3/4 c. unsweetened cocoa
*1 c. sugar
*1 tsp vanilla extract
*a pinch of salt
(I found that the batch I made with regular white sugar was
delicious, but the batch made with organic sugar what a
little thinker. I don't know if it is because the organic crystals are a
little bigger, but from now on, I use organic sugar.)
 
In a medium sauce pan, whisk the sugar, cocoa, and salt.
 Add water and bring to a boil, stirring occasionally.
As you whisk, the mixture will absorb the water and start to thicken slightly
Once boiling, reduce heat and cook for one minute.
Remove from heat and add vanilla.
Let the syrup cool for a little bit before pouring into your container.
Let cool completely before storing in the fridge. 
Ready to pour on pretty much anything! Yum!!
 
I use reusable jar lids by Ball for food that I don't put through the canning process. These lids are also great if you want to store craft items, pantry items, school supplies, or small items for a tool chest (nails or screws).


Sunday, August 26, 2012

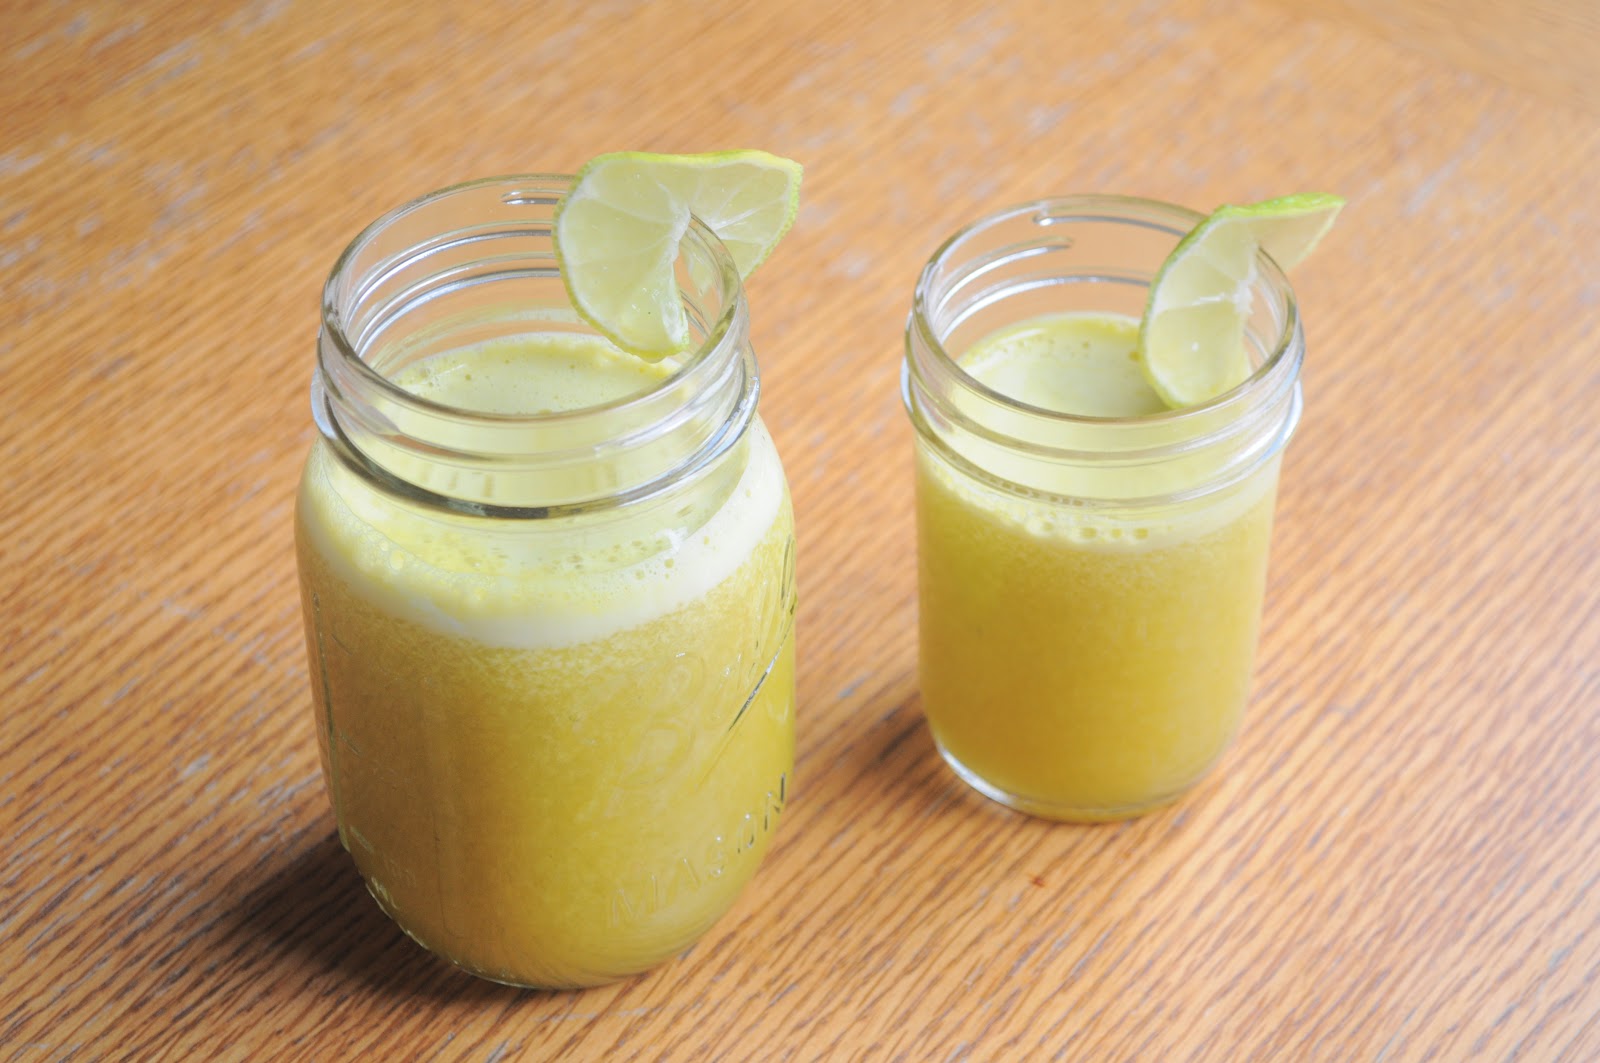
Sips of Sunshine

I love to start our days with a glass of freshly squeezed juice. Rachel really enjoys helping me gather our fresh produce and drop them in the juicer.  I suggest leaving you countertop produce in the fridge over night so it gets cold before you juice. You can put your juice in the fridge after you make it, but if you want to enjoy it right away,  I suggested prepping your produce the night before.
 
Our "Liquid Sunshine"
*Oranges
*Grapefruit
*Kale
Babywearing while juicing. Tess is such a big helper. Y
 
  Mommy's & Rachel's


Saturday, August 25, 2012

Wipe Container Makeover

Anything that can make diaper changing more
enjoyable or "fun" for both me and my stinker is great.
I was tired of looking at our not-so-lovely wipe containers,
so I decided to put some extra fabric to good use.
 
I purchased a bulk box of wipe containers on Amazon.com. I paid $16 for eight wipe containers using their Subscribe & Save option. Two dollars per container and they were at my house in two days.
I'd say that's a win-win!
(The price may have gone up or down since I purchased mine) I knew I wanted to decorate a few for myself and give some away, so the bulk concept was perfect. We use cloth wipes and fortunately, they fit perfectly in a disposable wipe container.
 
Here are the materials that you will
 need to cover your wipe container:
 
*Fabric of your choice
*Scissors
*Mod Podge
*Sponge Brush
*Pen
Start by cutting a big chunk of your fabric into a long rectangle. You won't need tons of fabric, so starting with a nice sized piece will leave you with plenty. (Sorry, I don't have exact measurements for the fabric used in this craft; I just eyeballed it.) If you are buying by the yard, I would get one yard so you have the option to make a few.  
 
Line the edge of your fabric up to the top of the container, tucked underneath the lip of the lid. Next, cut the fabric a couple of inches below the bottom of the container.
  
Use the Mod Podge and the sponge brush to coat the container as you go. smooth the fabric around the container and add Mod Podge along the way. I started in the back so that the front didn't show the overlap of fabric.  
 
Start at one corner, fold down the fabric, and
glue to the bottom of the container. 
 
Cut a small rectangle of fabric
to fit over the open space.
  
*Let the bottom dry before doing the next step
or it will stick to whatever you put it on.*
Cut another small piece and fit it over the top of your container. Trace along the flip-top part of the lid.
Cut around your trace and glue to the top.
Voilà! 
 Here are a few others we have around the house.
 
 Our decorated wipe containers make our changing stations look so much cuter and personal! Try looking for fabrics that match your nursery or changing area. It also might be fun to find a print with movie characters or your child's favorite colors, and have him or her help you decorate your containers. This might encourage  your little one to sit still during changes.

Check out my post All About Cloth Wipes!
Let me know if you have any questions!